Disclosure: In any review for a product or service, products or compensation may have been provided to me to help facilitate my review. All opinions are my own and honest. I am disclosing this in accordance with FTC Guidelines. Please see “Disclose” and "Terms of Use" tabs for more information.
I absolutely love to craft, but I will admit that with all on my plate right now, I find that I really don’t have time to do all the crafts that I have found on the internet and pinterest 🙂 . However, I must admit that whenI find something that looks cute, simple, and somewhat quick I’m all over it.
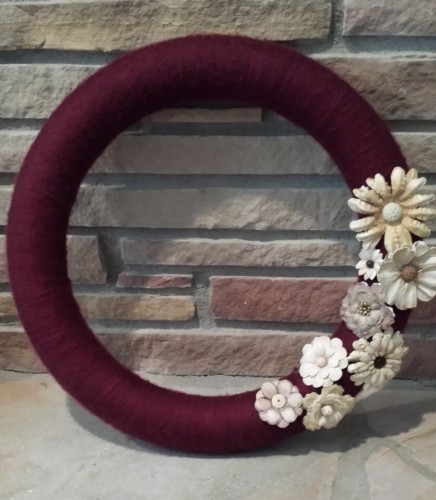
A few weeks ago myself and a friend decided that we were going to have a craft weekend for some fall crafts. Stay tuned for DIY Instructions for all of the projects we did that weekend. The first that I want to share with you is My Yarn Wreath.
Supplies:
- Foam Wreath (any shape/style/size you prefer)
- Yarn Color of Your Choice
- Any flowers (I was all about fast so I used scrapbook type stickers)
- Glue Gun
How to get started:
- Get started wrapping your yarn around the wreath (Glue a beginning spot with yarn to get the wreath started)- Make sure to wrap very tight line it up closely.
- Keep wrapping until you are at the end.
- Glue the last of the yarn together when finished
- Arrange your flowers however you prefer and glue them on.
*TIPS*
- I found it extremely helpful to do a drop of hot glue here and there to help it stay together.
- I found it easier to do a bunch of wraps around the wreath and then slowly tighten each of them to make it work much easier.
I absolutely enjoyed doing this wreath and thought it was so quick and easy to get it done. I have several friends that have asked me to make one for them and I was so happy to do it. Altogether this wreath probably took me about 2.5 hours.
My daughters enjoyed helping me loop the yarn around the wreath. My oldest even helped me tighten the yarn around the entire wreath.


Speak Your Mind