Creating & Maintaining Beautiful Home Exteriors

old house

In the eternal quest to create beautiful and serene lived-in spaces, one could be forgiven for wanting to spend most of our time and financial resources on smartening up the inside of our homes, but we’re all about the holistic nature of things, and that means making sure that the face of our homes is taken care of but also, our gardens.  Now, if you have a million-Pound budget that’s great, we love celebrating with you but even if you don’t there are still a few relatively easily done things that you can do to create that superstar look.

GARDENS AND OUTDOOR SPACES

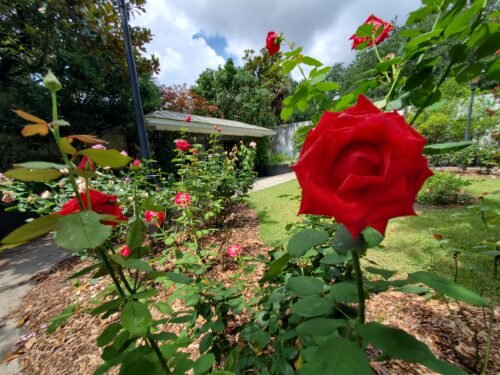
The secret to a beautiful garden is consistency…and time.  You won’t get your hanging gardens of Babylon overnight but you will get them if you’re prepared to invest a bit of time and money and the great thing about gardens is that you can spend as much or as little as you’d like.  The only difference it’s going to make is how much of the work you have to do yourself (or rope in a willing friend or family member).  You could also turn it into a family-based activity by designating tasks and spaces to different members of your tribe, they’ll be more invested in it and feel like they have a special place to go to, too. A gorgeous garden can also make your home more appealing to future buyers.

LAWNS

Just like an artist stretches, wets and prepares a canvas before painting, so to should you give that same attention to your lawn.  You’ll want to feed your lawn 4 times a year (not just in the spring), keep the height in mind when mowing, it’s as important as the height, water your lawn properly taking care not to overwater some areas, and under service others and make sure that you use premium grass seed.  This is an area that requires some patience and dedication but the rewards, oh so gorgeous!

“What is a weed? A plant whose virtues have never been discovered” – Ralph Waldo Emmerson

Those might sound like encouraging words for when one of your brood is the diamond in the rough type, but you don’t necessarily want wees in your garden.  There is a move in more water-scarce and desert areas to embrace these plants but check with a gardener first if it makes sense for you in your location.
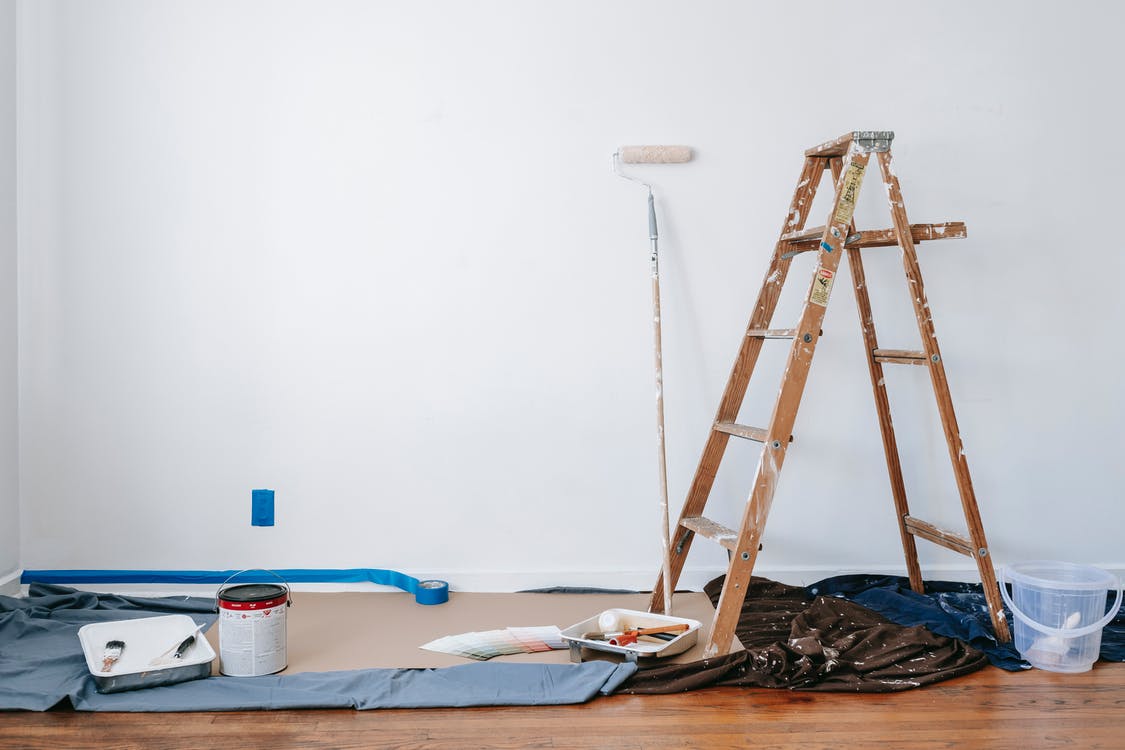
WASH THOSE WALLS

This is a super-easy way to instantly spruce up the exterior of your home and it requires very little effort.  Washing down your outside walls and outside spaces including walkways, paved areas, sheds, and garages will give your home a virtual instant facelift.  It’s also going to tell you in pretty much real-time when it’s time for a new coat of paint.

USE WHAT YOU HAVE, CORRECTLY

So this speaks more to equipment usage than it does to actual decorating or landscaping, but it gets an “honourable mention” anyway and the reason for this is simple: far too many outdoor projects get left behind or not handled correctly because our outdoor equipment isn’t maintained properly.  We’re also mentioning this here because there are even far greater implications – if necessary maintenance work is not conducted in time and in good order, this could have terrible consequences for your home.  So ensure that your equipment is well maintained and you have the necessary parts to fix your outdoor power equipment.

Home Repairs You Can Quickly DIY with No Experience

DIY home repairs

It’s not always easy to know which home repairs you can quickly do on your own with no experience. However, do-it-yourself projects can be a great way to save money, and they also allow you to learn more about how things work in your home. 

So, here is a list of common DIY home repair projects that are surprisingly simple for anyone who wants to take the time and effort.

Repaint Job

Before starting any home repair job, it is essential to identify if you need additional help from a professional to do the project correctly. But you can paint your house yourself. And you should know that some jobs like sanding down the walls before painting and using a roller or paintbrush.

A crucial part of repainting a house is to sand down the walls before applying paint correctly. It will help if you start by removing any baseboard or casing around doors and windows, which will expose more of your wall for proper sanding.

Fix Your AC

You can quickly fix your air conditioning unit by replacing the motor. The first step is to remove the front grill of the AC and inspect it for damage, like dents or cracks in any part of it. If there are damages that you cannot live with, then replace all components, including fan blades, coil fins, and compressor oil caps.

Once you have everything replaced, check to see if it still does not work. If that is the case, make sure all wires are correctly connected and tighten them down with electrical wire nuts. Depending on what’s broken in your AC unit, you can also purchase a new compressor or thermal cut-off switch. It should be easy for most people to complete this repair in less than two hours.

You can also clean the air filter by vacuuming it with a hose or using compressed air to get all the dust and debris out. If you have pets, then be sure to change your filters every three months as they will clog up quickly if not changed regularly due to pet hair. Then, fix your AC in less than two hours with no experience. But if all these seems like a hassle, consider hiring a 24 Hour AC Repair company. 

Leaking Pipes

Leaks can cause a lot of damage to your home;therefore, they must be repaired immediately. However, if you have the right tools and know-how, it is possible to fix leaks in pipes without hiring a plumber (which could cost hundreds or thousands).

The first step when repairing any pipe leak is turning off all water flow to the pipe. This is done by turning off all water to your home at the main shut-off valve. At this point, you should then go outside and turn on a faucet so that any remaining pressure in the pipes will drain out of them. This will allow you to begin working on the pipe.

Once you have removed the cap from your leaking pipe, some debris may be at the bottom, which could cause further problems later on if not taken care of now. Using a wire brush or sandpaper, clean out the inside of your pipe so that it is smooth. 

You can DIY home repairs with no experience by following the steps in this article. However, some projects require more attention than others, and you may want to consider hiring a professional instead. You might also want to avoid some DIY disasters that you may encounter for a smooth sail.

Tips for Sprucing Up Your Home Office

work from home

If you’re not a fan of your home office, chances are it’s time to spruce the place up. A cluttered desk and a messy floor can make any room feel cramped and uninviting. 

With these tips, you’ll be able to transform your space into a clean, fresh environment that will inspire creativity and productivity.

Declutter Your Desk

If you are currently, dealing with a desk that is overly cluttered, there are some things you can do to avoid an organizational nightmare. 

Start by removing knickknacks, papers, and anything else that’s not necessary for your workspace. After that, make sure you have enough room on your desk for everything you need for the day. 

Find an ergonomic desk chair. You want to find one with good back support and armrests for comfort. This will allow you to sit up straight and avoid slouching which can lead to neck pain and other problems down the line. You can also try using an ergonomic laptop riser to make things easier on your eyes, neck, and back.

Make Sure Everything Is In Its Place

Use file folders for loose documents such as notes, drafts of blog posts, and other reference materials to keep papers off the surface of your desk.

Use a filing cabinet to store important tax records or urgent documents that you need on hand at all times, but don’t necessarily need within arms reach each day. 

Add Artwork to Your Walls

If you’re feeling tired of looking at your old work posters, consider hanging up some art on the wall that makes you happy. Make sure you really enjoy looking at it though. 

Try hanging up a screen-printed poster of your favorite song lyrics. There are some great websites that sell affordable art prints of photos and song lyrics from indie artists who hand-make them! 

Let Light In

Clean any windows in the room, which will help bring in natural light and eliminate glare from computer screens.

A lot of people find that their home office is not conducive to productivity because it’s too dark or they can’t concentrate due to distracting noises. It’s important to make sure you’ve done everything you can to create an environment where you’ll be more productive.

Add Some Color

Color is proven to affect mood and productivity levels. Changing the color scheme of your office décor might help relieve stress and increase productivity levels. 

Use a neutral or soothing color that won’t clash with any existing furniture or decorations, to avoid creating a cluttered look.

Add Plants that Naturally Filter Out Toxins

Adding plants to your home office can increase air quality and provide a soothing mood boost. Plants like rhododendrons, spider plants, and peace lilies are scientifically proven to purify the air while you work.

Even if you don’t add these purifying plants, add some beauty to the decor with some of your favorite plants.

Get Your Office Looking It’s Best

By applying all the tips and tricks given here you can get your office looking its best in no time. All you have to do is decide where you want to start. Once you decide how to start making changes, do a little at a time until you get the desired look.

How To Get Your Furniture Ready For Moving Day

No matter if you’re going the DIY-way or have professional movers at your disposal – you need to get your furniture ready for moving day. Unfortunately, moving isn’t just done with packing a few boxes. You also want your furniture to arrive intact at your home. You can do quite a lot to make your move a little easier from the beginning. Don’t forget to schedule a pickup for furniture removal with items you want to let go of.

packing

All Good Preparations Start With Decluttering

Your furniture is most likely filled with all sorts of stuff. But have you looked at your clutter? Packing is actually the perfect opportunity for some serious decluttering. You’re pulling everything out anyway. What you haven’t used in ages can as well leave your space. It’d be a dead weight you’d have less to move.

Go room by room and start packing on time. It’s usually best to start packing a couple of weeks before moving day. Start with the items you need the least over the next few weeks. Go room by room, furniture by furniture. Pull everything out and organize it into keep, sell/donate, and junk boxes. Label the boxes accordingly. 

Do the same with your closet. With drawers you can take advantage of a small trick: declutter the drawers and wrap them up before moving day. You can easily transport every single drawer and save on annoying boxes. 

Since Your Furniture is Empty…

Give your furniture a wipe before the move. Firstly, it’ll be easier to transport and you don’t get dirty hands (or the movers, respectively). Secondly, you don’t carry dirt or grime into your new home. 

Then take a good look at it. Do you really want to take all of it with you? Are there items that’d be ready for furniture removal? You certainly have a good idea already where to put which item in your new home. It should also be mentioned that the less you have to transport, the quicker the move is done. 

And the cheaper it will get, too. If it’s wobbly and hard to repair, drop it. If you were thinking of an upgrade, get new furniture delivered to your new home. Drop the rest of it and let the furniture removal take care of the old. 

Disassembly is Crucial

Take each furniture item apart that you can take apart. With some older models, it might not be possible, but more recent furniture can usually be disassembled. For this task, it’s handy to still have the assembly instructions. 

Always keep them, if you can. When you look at the assembly instructions, you basically only have to follow them in reverse order. If not, you’ll have to find your way through each item. 

Collect all screws in a sealable bag for each furniture item. Label it accordingly and either tape it on a piece of the furniture or keep it in an additional small box. If you can, remove legs from tables, too. Also, remove knobs from drawers so they’re easier to stack during transport. 

The reason for disassembly is rather easy to understand: your furniture is not as bulky and easier to transport while it takes up less space in a moving van. You can start disassembly as you pack from each furniture item. Bookshelves are usually very easy to disassemble as well as bed frames. Of course, it’ll be near to impossible, if it’s glued. 

If you’ve chosen to let go of some furniture, you can disassemble it as well. The furniture removal guys could certainly do it, but you’d make their task a little easier. Pay attention that no nails sticking out. 

Wrap it All Up

To make sure your furniture arrives sound and safely in your new home, wrap it up. Use moving blankets and bubble wrap for the more delicate pieces made of glass or ceramics. Moving blankets are perfect for any wooden furniture. Plastic wrap is great to wrap up upholstery to avoid damages. You never know if it might start to rain during the move. Or maybe someone spills a drink. At best, you don’t want to have to call for furniture removal twice.

To save on wrapping material for the smaller bits and pieces, you can wrap dishes in towels, for example. Even though it appears a little chaotic, putting vases or lamps in between bed linen might be as effective. On the upside: you’ll be looking for both items rather soon.

When to Schedule Furniture Removal

Theoretically, the removal team can be around at any time between today and tomorrow. Practically, the guys tend to be rather busy during spring and fall. That’s when most people for a spring or a fall clean and also needs removal. Hence, you might benefit from arranging a pickup in advance. If you’ve got a set date for it, you can easily fit it into your moving schedule. Check your home the day before removal collection for any items you might want to drop. If you forget an item, you’ll have to call them back and pay additional fees.

Fortunately, you usually have a rough idea of which items you’re going to take into your new home. Try to sell your clutter before the guys come around. You won’t only have made a few bucks on the side. What you couldn’t sell can be taken care of by the same team. Such services don’t only remove furniture, but also junk removal.

Parting Words

Since time is likely not on your side during the preparations for your move, hand them your items for donation, too. Almost all services have partnered with charities. They noticed, they often pull out stuff that’s still good to use. What better solution could there be than to hand it to people in need?

5 Tips to Create a Seamless Transition between Interior and Exterior

When it comes to the interiors and exteriors of your home, it’s certainly possible to make it flow. The transition of indoors going out is something that many homes around the world do in warmer climates. You don’t even need to live in a year-round warm climate to achieve a seamless transition between indoors and outdoors. This guide will help you feel more connected to nature and create healthy air flow by creating a seamless transition.

large windows

Large windows

If you look at pictures of cabanas, you’ll notice there are giant walkways (such as arches) or large windows. Large windows would be the best way for most houses. This is a great way to open up your home to the outside world by bringing in more natural light and fresh air. Removing your walls between the backyard and your house and placing large windows, will result in the indoor space having a large appearance.

Sliding Doors

Both sliding doors and concertina doors perfectly complement large windows. This will also create the illusion of a larger interior while also bringing in more natural light. This also continues the flow on the wall that the large windows create. The “walls” between the inside and outside disappear once the door is open, which then beautifully combines the two elements. The larger the opening, the better the transition. This will also help encourage you to wander outside as well.

Lighting

Light has the power to blend spaced. Natural lighting brings the outdoor lighting in, but the same can also happen for the artificial lighting in the house. Proper lighting can make both interior and exterior lighting feel cozier and create a nice atmosphere. There are plenty of ways to make this sustainable and energy effect such as looking into community solar in MA to help utilize that method. Having steady lighting between both spaces will create a nice blend that can then help illuminate particular parts of the space such as the use of fairy lights.

Decorative accents

Decorative pieces can be both flexible but can also be a great way to help with organizing your home. You’ll want to find decorative accents and even furniture that can be used both indoors and outdoors. This tip is a great way to create a seamless transition while looking stylish too. A great example would be wicker material. Wicker chairs and wicker décor such as baskets are extremely flexible as they can be used both indoors and outdoors while also looking completely fantastic.

You will however want to consider what other materials that you use as it will need to be durable when it’s outside. Another great idea would be to incorporating textiles such as cushions and rugs since these are flexible enough to be used in bother spaced.

Floor levels

This may be an odd tip, but if you’re able to avoid any floor level changes between the interior and exterior transition, then this could be a way to make it seamless. Steps are usually the dividers when it comes to these two spaces. But having the floor levels not change, as in no steps, will help prevent both a visual and mental break between the interior and the exterior of the home. 

How To Make Your Garden More Appealing To Future Buyers

gardening tips and tricks

Your garden is important to maintain for the future sale of your home. The exterior matters just as much as the interior. Thus, it is important to make your garden look as good as possible when buyers come to look around. If you lack gardening skills or knowledge and want some help to boost the curb appeal of your garden, here are some tips.

Clean it up 

Cleaning the garden is more than just a quick sweep of the fallen leaves. If you really want to impress future buyers then you can benefit from cleaning the patio, wooden features, and other areas that can be cleaned. 

For instance, Pressure Washing your patio can make it look as good as new. Instead of steering buyers away because your patio looks old and looks like it will be expensive to replace, you can show them the true potential of the home and show them that the garden is well maintained, which will keep their costs down.

Tidy up

Ensuring to organize your family home goes for more than the cupboards. Organising your garden and making it neat and tidy will look good to the buyers. 

As much as cleaning helps, tidying does too. If your garden is clean but messy, it will not be appealing to your buyers. Make sure to tidy up the grass, the flowers, and any other mess before people come to look at your property. 

Refresh the lawn

Refreshing the lawn frequently will ensure that your home is always ready for buyers. Some people book last-minute viewings and you will want to make sure that your place is always ready. 

Refreshing and trimming the lawn when it grows is more than enough to make your garden look well cared for and maintained. 

Or, add artificial grass

If you lack gardening skills or time to care for the grass, then you might want to consider artificial grass. This requires no maintenance and can be appealing for future buyers who also want to enjoy easy garden maintenance. 

After laying it down, you won’t need to do anything to it. It will keep its vibrancy and not need trimming.

Plant flowers

If your garden lacks color, then it might not show off its full potential. Adding colour and vibrancy will enhance its appeal and look well cared for. 

Planting flowers that are long-lasting will be great for the buyers as they can maintain them and enjoy their beauty after they move in. Ensure to hand over your tips so that they can enjoy the garden in the same way that you have.

Add a fun feature

A garden with a fun feature can be the unique selling point of the house. You might want to add a fountain, a treehouse, or a play area to make the garden more inviting and interesting. 

Ensure that it doesn’t take over the entire garden as the buyers might want lawn space or an area to add their own plants. You won’t want it to detract from its appeal. 

Utilise storage space

Storage space is ideal for the garden as well as the interior. New buyers might want a space to store garden tools, bikes, or sun loungers. 

Adding storage space makes the garden more functional and practical. It will also ensure that you can keep the garden tidy.

Make sure your garden walls and fences are in good condition

Your garden walls and fences should always be in good condition for your own safety and to increase the appeal to future buyers. 

If your walls and fences are in bad condition, not only will the future buyers assume that the house is unsafe, but it will result in them having to pay for a new wall or fence. It can be expensive to replace a wall or fence. Thus, maintaining it will keep your costs down as well as the future buyers, which will make your home more appealing. 

Add outdoor furniture

Although adding outdoor furniture can be costly, it could be a selling point for your home. You may want to take it with you or leave it behind for the new buyers. Either way, adding outdoor furniture will show off your gardens full potential. 

Without these features, your garden may not be appealing or inviting. You will want your garden to be as welcoming as possible to help the buyers feel at home. 

Grow your own produce

Growing your own produce is a bit of fun when you are living in the home. Plus, it will be very appealing for your future buyers. 

When you grow your own produce you can enjoy a fun hobby, live more sustainably, and save money. Most future buyers are looking at living more sustainably and reducing the cost of living, which a vegetable patch can help them achieve.

Ensure to enhance the shelter

Although people spend time in the garden to be outside, sometimes the weather can hinder that. Thus, if your garden has a shelter, it will be usable in all weather conditions. No matter if it is raining or hot, you and your future buyers will be able to use the shelter and spend time in the garden at any time of day or year. 

A shelter could be a shed, large umbrella, or marquee. Whatever shelter you have, ensure to show it off to the buyers so that they know they can enjoy the garden in any weather. 

Add a patio

If your garden lacks a patio, you might want to consider adding one. These are ideal for social spaces and again, make the garden more accessible no matter the weather. 

Patios are a great way to add value to the home and can enhance the welcoming feel of a garden. If your garden is all grass, it can be a lot of maintenance for the future buyer and may not be ideal for rainy seasons. Even a small patio area can be enough to make your garden more inviting and appealing to buyers. 

Getting Ready For Fall

We may well be in the thick of August, but you can still smell the Fall just around the corner and the leaves are starting to turn a little. The deliciously warm weather is beautiful on the skin, but those early evening winds are picking up. The seasons are always in transition, and that means your home should be, too. The temperatures are just about cooling down and the changes in the season mean that there are certain jobs that you should be doing right now to get ready.

It’s always best to prepare for the Fall ahead as early as you can. Those Canadian September weather months are biting as the snow prepares to fall, and you need to ensure that your home is ready for it. With this in mind, here are some of the things that you can do to get your home ready for Fall.

ready for fall

  1. Start with getting your things organized. We’re not too far from the end of August right now, so it’s the time to start putting those summery clothes away and bringing out some of the cardigans and jeans that you’ve stashed during the heat. You need to decide how you’re going to get your clothes stored away to keep them from getting moldy in moist air. 
  2. Get the school supplies! If you’ve got kids going back to school soon, it’s time to shop for supplies and make sure that everyone is squared away and ready for the new school year. School days are creeping up fast and you need to not be snowed under by all the tasks that are involved in getting ready for school.
  3. Clean the oven. When was the last time you deep cleaned the oven properly? As the weather starts to cool off, you’re going to be using the oven much more for those stews and casseroles you save up for the winter. There are so many things that you’ll want to cook to warm the tummies of everyone in the family, and it’s always better to do that in a freshly cleaned oven.
  4. Call in the cleaners. Decluttering and cleaning out the house is a must and if you plan to feel organized and ready for the season, clutter needs to be given a place or sent to the trash. As the kids head to a new school year, taking all of their older clothes and things to the charity shop is a good way to declutter and get rid of everything. You can always hire a van to help you to get rid of things if you need to, but either way, it’s time to chuck it all out!
  5. Clear the outside. From making sure you have clean gutters to cutting back the weeds, you need to clear the outside of your home. Get the lawn prepared for the season and get your garden tools properly stored away. Now’s the time to make sure that the garden can withstand the cold.

We all love the Fall and the crispy cold weather it brings, but you need to prepare for it. Use the tips above and make it happen!

Etching Stainless Steel: A Quick Guide

With the ever-increasing popularity of chemically-etched metals, there’s more and more opportunity for these products to be used in a wide range of industries. The reason for its wide applicability is thanks to the process of chemical etching itself. By using etchants to treat certain metals we’re able to achieve incredibly fine detail, precise measurements as small as 25 μm. Because of the capability to produce intricate and structurally unchanged results, chemical etching has become a leading force in the precision metal parts manufacturing industry. In this guide, I’ll hope to shed some light on the process.

What is it Used For?

Before we look at the process, let’s investigate what it’s actually being used for? With the ever-increasing need for small precision parts to fit in computers, household appliances, cars etc. there is a massive increase in demand for chemically-etched parts. Products like speaker grilles, filters, fuel cell plates, encoder discs and many more are all made using this process as it’s one of the most reliable methods to get the necessary high-quality results. Chemical-etching is perfectly suited to deliver reliable precision on an industrial scale. 

One of the great benefits is that as part of the very nature of the process, there are no burrs or stresses on the metal to be tidied up after the initial manufacturing; unlike in many other etching processes. The fact that the metal comes out more or less as an end-product also means that production times are greatly reduced as well as the fact that it’s a process that’s very quick anyway because the etchant is applied to sheet metal and acts at the same time. As you can see, there’s certainly a number of fantastic benefits when using chemical etching to produce micro precision parts. 

The Production Process

At its core, chemical etching is a subtractive process that employs temperature-controlled etchants to selectively corrode and dissolve the unwanted material. In order to achieve the desired shapes a stencil in the form of a photo-resist is used as an outline that protects the metal parts we want to keep. Let’s look at the process we employ at Tecan in a little more detail:

1 – Cleaning

Firstly, the sheet metal is cleaned to remove any surface contaminants. An essential step to ensure the rest of the process goes successfully. 

2 – Laminating

This is done in a class 6 clean environment where the photo-resist stencil can be applied to the metal. This lamination will then protect the parts of the metal we want to keep. 

3 – Exposing

The metal is exposed to a UV lamp which hardens the photo-resist into the desired pattern or shape required. In this instance, the white areas are the hardened photo-resist while the black are the exposed metal which will later be treated with etchant. 

4 – Developing

At this stage, the unexposed parts are developed away which then leaves the bare metal underneath, ready to receive the chemical etchant.

5 – Etching 

The etchant is sprayed all over the sheet metal at high pressure which removes the exposed and unwanted metal.

6 – Stripping

Finally, the resist is completely removed to reveal the desired shape: burr and stress-free. This is the reason why it’s a simple and easily repeatable process that meets the rigorous demands of many industries. 

Virtually any metal can undergo the etching process (always check with the company first!) but some of the most common include: 

  • austenitic, ferritic and martensitic stainless steels
  • mild steel, tool steel, carbon steel, spring steel
  • aluminum: including aerospace and aircraft grades
  • nickel alloys: mu-metal, inconel and alloy 42
  • phosphor bronze, brass, beryllium copper and nickel silver

The Benefits of Using Chemical Etching

As mentioned throughout, one of the key benefits of using chemical etching is the end result which is ready-to-go almost directly from the production line. A result of this is also that the total cost is reduced because of the lower production times. It’s also a quick process from prototype to final design; adjustments can be made quickly and on-the-go as it’s only the computer programme that needs altering. 

By using chemical etching it removes the need for any high energy processes like laser-etching or stamping which can tamper with the ductility and structure of the metal which of course isn’t a desired side-effect. Chemical etching leaves the metal’s properties unaffected by the process which is exactly what you want when you need to rely on the final product, like in the medical or aerospace industries. It’s evident that chemical etching offers a great many benefits of use: precision, reliability, adaptability and repeatability on an industrial scale! All these reasons have served to make chemical etching one of the best solutions for precision metal parts manufacturing.