Avoid the “Covid Slide”- Keep Your Kids Learning While Having Fun!

If you are like me, you are willing to try ANYTHING to keep your kids active and learning over the summer- not to mention, really, since Covid became part of our existence. It’s hard when they aren’t in school, and many of us don’t know what to do to keep them from losing knowledge (or from wanting to be in front of the TV and video games all day, ugh). Here are a few DIY kits we’ve really loved.

Solar-Powered Rovers

Click Here for more info and to buy for your kids!

Want to build fun solar-powered vehicles and devices that move using electricity generated directly from sunlight? With this kit, you can construct five motorized models. Build three types of solar cars, a solar fan, and a solar robot model. Conduct science experiments with each model to learn about gear ratios, solar cells, and more. The ultralight materials, including strong bamboo rods, make your models speedy and durable. A modular gearing system lets you test out three different gear ratios. Experiment with a solar cell, electric motor, gears, and ultralight materials. Build five different solar-powered models. Learn about how solar cells work and  about the energy from the sun. Ages 8+ MSRP: $19.95.

Creatto

Click Here for more info and to buy for your kids!

With CREATTO, you can design and construct illuminated, three-dimensional creations that literally light up your life! The kit includes flexible yet durable interlocking plastic tiles and a string of LED lights that you can piece together to make animals, decorations, or your own custom creations. Each set includes an illustrated manual with easy, step-by-step instructions for multiple designs, but the building possibilities are nearly limitless using your imagination. Creatto is available in 3 fun sizes: mini, medi, and maxi. Kids can choose to build: Moonlight Elephant Safari: Ages 6+ MSRP: $9.95; Magical Moose & Forest Friends: Ages 6+ MSRP: $9.95; Starlight Kitty & Cutie Crew: Ages 8+ MSRP: $19.95; Shimmer Shark & Ocean Pals: Ages 9+ MSRP: $29.95; Sparkle Unicorn & Friends: Ages 9+ MSRP: $29.95.
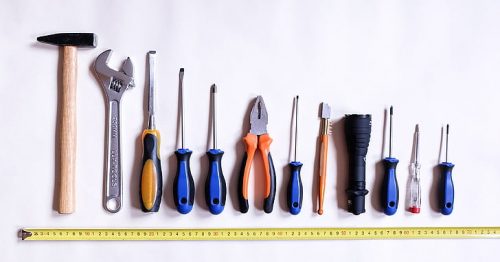
6 Handy Tools That Can Be Used At Home

tools

It is that time of the year when you may be considering some spring cleaning, which requires you to do some fixing and repairing things up in your house. If you are an electronics aficionado, you are probably searching for some handy tools to fix your wires and gizmos. 

Please read this extremely helpful guide on what all tools can you consider this season for sprucing things up. 

Screwdrivers

Our houses, electrical equipment, cars, television sets, doors, windows, etc. are all held together by screws. These extremely valuable instruments come in various sizes and can be used in different settings. However, these screws come off quite often, and this can be quite a painful affair for some of us. Imagine we being unable to close the bathroom door simply because the screw holding the door handle has come out! Or the screw of the car door handle is loose, so we cannot shut the former and make our drive safe. 

This is where the humble screwdriver comes in. It fastens things together. You can use it to install a small shelf, put together a small radio set or simply tighten up certain things. If you want to get a good idea about the various types of screwdrivers available in the market, their prices etc., visit website

Cordless Drill

As a home manager, you’d like, at certain times, to put up a shelf for placing small objects such as the TV remote, car keys, and much more. This is where a cordless drill comes in. With this hand-held machine, you can drill holes in the wall, kitchen cabinets, etc. and get your work done. Don’t forget to check whether you have a mini-stool at your home while buying this drill. You might need that stool to reach out to remote corners for drilling holes. Also, keep your cordless drill charged at all times. Replace batteries periodically so that your work doesn’t suffer. 

Testers

If you like dabbling in tech and all things electrical, then you would definitely need a tester. A tester is a small hand-held device that can detect electrical current in circuits and equipment. You need this device while assembling your transistor, fixing your TV set or checking your electrical connections. 

To use a tester, apply its one end to the wire, and touch the other end (enclosed in glass) with your finger. If the bulb lights up, this means there is current in the wire. That said, we’d also advise you to wear rubber boots while handling live electrical equipment. 

Allen Wrench 

This being the world of DIY and IKEA, you should seriously consider having an Allen Wrench in your worker’s kit. This L-shaped wrench is used to assemble furniture quickly and efficiently. Allen Wrenches are used where the sockets are hexagonal and are quite a rage in many Australian homes these days. 

Solder Iron

A soldering iron is used to assemble circuit sets, transistors, etc. This extremely simple machine consists of a heating rod and a solder wire. The iron used is heated by plugging it to an electrical source. Once it gets sufficiently heated, apply the wire to its one end, watch it melt, and then apply the iron to the turnouts on the circuit. 

If you have kids, we will request you to keep this device away from them. Since a soldering iron becomes very hot during heating, keep a pail of water nearby. After use, keep your solder iron in its station so that it doesn’t damage things kept nearby. 

Hammer and Nails 

Hammers and nails keep things up and standing in your house. They are chiefly used to assemble furniture, hang picture frames and calendars. To spruce things up, you may consider buying differently colored nails for your cabinet. 

How to create your own custom cap

Why would you ever buy a hat that isn’t according to your desires? In fact, why would you buy a ready-made product when you create your own?

Custom caps are just one among many customizable items that you can create with minimal effort. Create a cap that says more about you or your brand. Or, create something that will feel special and unique. Stop buying generic items that will make you feel the same like thousands of other people. Instead, create something that will scream you!

Here is a step-by-step guide that will help you create your first custom cap. Read on!


Pick the right type of a cap


First, you should start by choosing the right cap type. This will be the basis for your design and will likely impact how the finished item looks like. Most custom cap companies have cap types visibly displayed within a store. You won’t have to browse too much as you can quickly find what you’re looking for.


Choose the right color scheme


Color is every bit as important as the hat design. It creates the right background where you will place your logo, image or company log. No matter what, make sure to find a color that will match well with it but also, show your persona in the right way. Most custom hat companies offer a limited number of colors: for example, from 8 to 12. In most cases, these will be the basic colors. You might think that you will need more than that for a base but in most cases, this will be more than enough.


Add an image or a logo


Image or logo should be the centerpiece of a hat. Everything else is interchangeable and even if you manage to create a nice color combination, it still comes down to image that you will be using. In the end, this is the reason why you decided to make a custom hat in the first place, right? Sites that sell custom hats usually have their own designers so you can rely your wishes to them as they will surely oblige. Alternatively, you can draw or create your own logo or image and pass it to the company.


Adding text

People are usually divided when it comes to text. Some people will focus on image while the rest will just want to have a text on their hat. Of course, you can also have a combination of the two. Text can also be created in a specific color. You can go for brand’s colors or a color that will go well with your logo or basic scheme. This part is really easy. When you land on hat company’s site, all you have to do is choose font and what will say on your hat. Also, don’t forget to choose the position where it will be placed.


Finishing touches


When everything is said and done, you need to make sure that your design is flawless. There is no need to rush; take your time as your design will remain stored on site. Once you’re certain this is what you want, all you need to do is add to cart and finish the payment. Shipping for custom hats is usually very fast so you won’t have to wait too much for the finished product. Keep in mind that creating a custom hat is an experience in itself. It can be really fun and if you like to draw and create your own images, it can be an amazing way to express yourself!

Cost Effective Home Makeover Tips You Should Know


Doing a home makeover is not a big deal. What you need is an excellent plan which contains some creative and innovative tips. In fact, you don’t need a lot of money to have a home makeover. Here are ten cost effective home makeover tips which you should know;


Repaint

Repainting is the least inexpensive method to do a home makeover. When you repaint your home, it will definitely look more attractive and beautiful.


Don’t just paint your walls only. You should also repaint your shelves, cabinets and dressers. Also, make sure that you choose the correct color combination. As asserted by Country Living, it is wise to look out for the latest color and interior design trends.


Install Advanced Home Security Systems


You should have advanced home security systems. A reliable security system will keep you, your loved ones, and your property safe.  


There is a common myth which states that advanced home security systems are expensive. Worry not – you can find some affordable security systems if you deal with the right security companies.


Perhaps you already have a home security system. If so, you should scan it and see whether it is still functioning properly. If not, then you should replace it with a new one.


If you just have a simple security system, you can swap it with a more advanced one. If you own an advanced home security system, you will eliminate all possible attacks of burglars and thieves.


Install Beadboard Ceiling


Beadboard ceiling is cheap. What’s more – it is a great tool which you can use to totally revamp your home décor!


If you install beadboard ceiling, your house will look more attractive, sleek and elegant. What you need to do is to buy beadboard from a local hardware vendor, then install it yourself.


After buying the beadboard, you should measure and make it proportionate to the size of your house. Then you just fit it in. However, if this process looks to be difficult to you, you can hire a local handy man to do the fixing for you at a small fee.


Use Artisanal Homewares


You should always strive to purchase homewares which appear unique and attractive.  This will make your home to have a new look.


Avoid purchasing homewares from large store chains. Homewares from these chains are usually generic and expensive. However, you should take your time to look out for specific artisans who design homewares. Most artisanal homewares are cheap and attractive.


Have A Focal Point


One of the most cost effective ways to remodel your home is to create a focal point. A focal point should be the main center of attraction in your home.


For instance; if the television is your main focal point, you should surround it with some of your most fashionable and stylish home décor. You should also place your major decorations around the television.


Use Themes Frequently


Each part of your home should adhere to a specific theme. You can do this by using matching patterns, accessories and color schemes.  


Moreover, you should not randomly hang your family photos and artworks on the walls. However, you should create galleries which all adhere to a specific and distinct theme. You will have to be really creative in designing these themes.


Make Your Accessories to Be More Stylish


Purchasing new accessories is not cost effective. To do a complete home makeover, you can just choose to update your existing home accessories. For instance; you can change your pillow covers. Or polish your worn out decorative items.


Improve On Your Flooring


Maybe your floor appears to be hideous and ugly. According to Business Today, an old dull floor can make your home to look gloomy and deplorable.


So, you should improve on your flooring. Installing new flooring is a costly affair; but there are cheaper alternatives to get rid of an ugly hideous floor.


Just buy a patterned carpet or rug and place it on your floor. You can also look out for artisanal rugs from online stores.


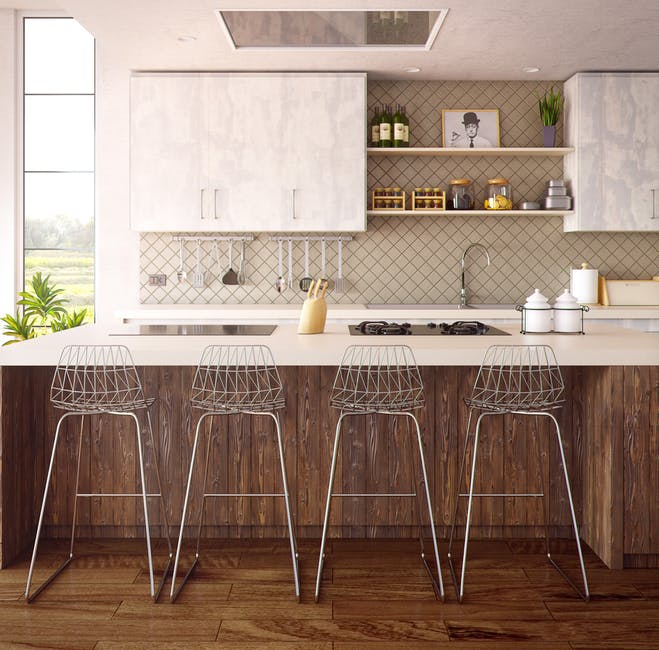
Add More Storage Space in Your Kitchen

Another ingenious way to have a home makeover is to increase your kitchen storage space. You should always aim to have more storage space especially if your kitchen appears to be cluttered.


You can increase your kitchen’s storage space by adding more racks, shelves and cabinets. Just make an appointment with a local carpenter and instruct him on your storage needs.


Moreover, you should install open shelves in preference to closed shelves. Open shelves offer a lot of flexibility in placing and retrieving items. Also, you can use open shelves to display some of your beautiful and valuable home décor.


Conclusion


You are not obligated to implement all of these tips. Even if you implement just one of these tips, your home will definitely be the point of envy of all your friends, neighbors and relatives.

Upgrading Your Kids’ Room – How Often is Too Often?

Living with kids often means having to adapt your lifestyle to certain changes that you may not be prepared to deal with. For example, the way you handle your own rooms might not necessarily work too well when it comes to the rooms your kids will live in, especially if you live with more than one child. You’ll want to plan ahead when it comes to upgrades and possibly even repairs, and you should always evaluate each situation carefully to figure out whether it’s appropriate to disturb the child’s current life.

Kids Don’t Like Frequent Change

One thing you should understand as early as possible is that kids simply don’t enjoy having their environment changing too often, especially in major ways. You might like thinking about upgrades and other changes to your own room, but when it comes to the ones your kids live in, you should not be too quick to spring into action.

Room improvements inevitably mean having to rearrange things temporarily, and even if it’s for a short while, that might seem like quite the long time to your kids themselves. It’s not just about finding an alternative room for them to stay in during the repair – this kind of disturbance is going to affect their mood more than you might like.

Don’t Postpone Repairs

On the other hand, repairs are not something you should put off. Even little things can add up quite quickly when you’re living with young children, and small issues in their day-to-day life can easily reflect back on you and make your own experience miserable. If something goes wrong, you should take the time to repair it as early as is convenient.

As long as you stick to what we mentioned above about avoiding any too frequent changes, you should be fine. If possible, group repairs together so that you can get more done in one go and not disturb your kids’ lives too much. Also, consider the option of setting things up in a way that minimizes potential damage in the first place. Invest a little more into sturdy furniture that will be resilient to damage, and this can make a big difference.

Quality of Life Upgrades

There are some things that your kids are definitely going to appreciate though, even when it means having to wait a little to get back into their room. Some kinds of improvements can matter a lot, especially to younger children. Giving them the ability to sleep better is one of those things, and even something as simple as taking the time to seek out the best mattress on the market can make a huge impact in the long run. There are various guides available on the Internet that can assist you with this, and it’s in your best interest to familiarize yourself with them as early as possible.

Don’t underestimate the amount of thinking and planning you should be putting into this though, as sleep is easily the number one factor that affects the moods of children on a regular basis. Ensuring that they have a comfortable time each night when they put their heads to rest is going to make a huge difference.

Keeping the Room Flexible for the Future

Don’t forget that this isn’t always going to be a kids’ room. Whether you want to accept the fact or not, your children are going to grow up one day. And even if you have new ones at some point, and they take over that room, it’s still going to be temporary. The point is, it’s not a bad idea to start thinking about what you could do with that room once the kids have moved out, even if it seems like it’s going to be a while until you get there.

The truth is, time flies when you’re raising children, and before you know it, that day will already be here. It’s much better to have something planned and know what you can do, rather than having to think about a solution on the spot. You might enjoy the idea of having an in-house office for your work though, so it might not be as bad as it looks. And if you want to make the transitional process as smooth and quick as possible, you should start setting things up from early on.

It’s true that you’ll have to change your way of thinking in some ways if you want to live with kids, but it’s not as difficult as some people make it out to be. All it takes is a little advance planning, knowing what’s available on the market, and of course, the right kind of communication with the little ones. The rest mostly comes down to common sense and having access to the right kinds of resources for each idea that pops up into your head.

7 Gorgeous Rustic Home-Decor Ideas to Make Your Home Unforgettable

Always loved the look of a beautiful country home and want to recreate it? Rustic decors are always a trend in home designs because they’re simple and they make any space cozy and inviting. Natural elements such as wood and other organic textures are the center of any good rustic home design.

The beauty of rustic home decors is that you can easily make pieces of your own without buying or spending too much. It doesn’t matter if you live in the center of the city or in the heart of a country; you can always recreate the feel of a simple country lifestyle in your home.

Of course, you can always buy rustic decors for your home if you want the convenience and if you want to instantly transform your space into a little charming cottage. They’re functional too, so they’re useful for additional storage on top of being a beautiful aesthetic.

If you already have the tools and the know-how of using different tools for big DIY projects like home decors, you can make them yourself. Check the list below for ideas.

Wooden Bath Caddy

This is a project you’ll enjoy if you’re good at woodworking and if you have a bathtub you’re fond of using at home. You’ll be needing a reclaimed wood board, screws, handy SDS drill, saw, and a waterproofer. You need to take measurements of your bathtub to cut the wood into the correct shape. It needs to be snug in order to prevent sliding.

Once the bath caddy is complete, make sure to paint it with a sealant to prevent water damage. You can fashion the caddy however you like by putting a slot for your wineglass or maybe a little compartment to hold little things.

Enjoy unwinding at the end of the day in the bath without worrying about having things wet, so put some candles, soap, or even your favorite book on it. 

Jute Twine Organizer

This is one of the easier DIY projects as you only need jute twine and a glue gun. To make a container, all you need to do is glue the twine together upward to make it look like a holder. You can make it in various shapes; square, rectangle, and circle are popular choices.

Once the twine wall is high enough, secure it by using more glue. You can make several of these and use them as organizers for decorative items or for personal items like shampoo and toilet paper.

Rustic Mason Jar Holders

Mason jars are wonderful glass jars that have a lot of uses. If your kitchen needs more storage or if you’re looking for ways to display utensils for convenience, then mason jars are great for this project. Paint the jars in earthy colors like soft, earthy brown, cream, and warm gray.

Decorate with twine by tying a piece near the mouth of jar once dry. You can also put the jars in a wood box if you want to secure them. You can also put labels on the jars to designate which utensils go to which bottle as well.

Wooden Coasters

There are many uses for wood slices, and one good project you can make out of them is to use them as wooden coasters. This is a good project if you have big fallen branches on hand, but if not, you can scour your neighborhood for some. Choose a branch that is thick in diameter, something wide enough to hold a mug or a cup.

You will need a hand saw to cut pieces and then sandpaper to smoothen the edges. Once you have your wood slices, coat them with clear varnish. You’re ready to impress your friends and guests with your wooden coasters.

Crate Bookshelf

Make use of old crates, and instead of letting them rot somewhere or putting them in the wood chipper, turn a bunch of them into your very own bookshelf instead. Since crates have certain size dimensions, you can make the bookshelf as high, as low, or as big as you want it to be.

You’ll be needing some sandpaper to smoothen it out and wood stain if you want it to appear darker. Put everything together using a drill and some screws, and reinforce it with a couple of L-brackets.

To complete the rustic-bookshelf look, put a lot of books in it. You can put hardbound books and even customized board books of your family, especially children. The nice thing about personalized board books is that you can create it according to your preferences and have as many as you like. You can one for pictures for your baby’s first year, for drawings, memories, and even one for coloring.

Driftwood Planter

Succulents are great plants for people who want to have something green and alive in their home but have no gardening experience. These plants are great because they don’t require much maintenance and need only to be watered once every couple of days. An alternative way to display these plants apart from their cute little earthenware pots is to put them inside a driftwood.

The number of succulent plants you can use for this DIY will depend on how large the driftwood piece is. You’ll also be needing moss and some floral glue; if you don’t have the latter, a hot glue gun is fine. You’ll be attaching the plants on the wood using glue and moss, and the finished project will look good on the mantel or on a wall-mounted shelf.

Keep It Simple

The beauty of the rustic home design is that it is easy to achieve, and that is why most beginner DIYers prefer this style. If you’re not that confident in your skills, keep your design simple. Once you get the hang of building things for your home, you can always go for intermediate to expert mode involving a lot of tools like saw cutting and even metals.

What is your favorite doable home design? Share your thoughts below.

5 Knitting Project Ideas for Beginners

You don’t need to be 60 to start knitting. In fact there are an increasing number of young people who have taken up knitting with some fantastic results.

The benefits of knitting are much more than the ability to create your own clothes; you can also knit gifts for others! It is also a great way of lowering your stress levels and keeping mentally active; this has been shown to help reduce the risk of age related memory loss.

Virtually any project is possible for the new knitter although you will find it is easier if you look at existing knitting patterns; this will give you a guide as to what you are supposed to do.

Here are some great knitting project ideas for beginners:


  • Scarf


The scarf is one of the simplest pieces of knitting because you only need to select the width of the scarf and the length. The width will dictate the number of stitches you need and the length will dictate the number of rows.

Keeping it one color will make it very simple to knit. To make it a little more difficult simply add a second color in.


  • Hat


The hat is also a fairly simple template. Again you’ll need a template. The width of your knitting will dictate the height of the hat, while the length will need to comply roughly with the circumference of the head that you are making the hat for.

Once you’ve completed what is effectively a mini scarf you’ll be able to stitch it together to make a simple beanie style hat.


  • The Blanket


This is a larger scale project than the scarf or hat but in essence just as simple. Again the width and length of your blanket is dictated by the number of stitches on your needle and how many rows you intend to do.

You can create several scarves in different colors and then stitch them together to make a large blanket. You and your partner will be able to snuggle under it on those long winter nights.


  • Leg Warmers


If you or your friend feel the chill or simply want to jump back a few years then you can knit some delightful leg warmers.

Again this simple project has a number of similarities to creating a scarf. You’ll simply need to stitch the ends together when you’ve found the right size for your legs.


  • Shawl


This can be just as simple as knitting a blanket but you can also take this project up to the next level by adding tassels to the edges of your shawl. This will transform it from a simply blanket style shawl to a fashionable piece.

All of these projects have knitting patterns but it is advisable to practice your stitches before you start knitting any of them. The best items are finished with smaller stitches; which means smaller needles and potentially more stitches width.

Taking your time to get your stitches right will ensure that the finished garment looks perfect; every time.

How to renovate your bathroom on a budget

According to Household Quotes, replacing a bathroom can cost anywhere from £2,500 to over £6,000 to complete. With such a high price tag on a total renovation, here are some creative alternatives to update your bathroom without breaking the bank.

  • Shabby chic or just plain shabby?

Take a look at your bathroom as it is and decide what does and does not work. Replacing units for the sake of having a completely new bathroom is simply a waste of money and it can quickly mean that you’ll break your budget.

That outdated avocado bath-tub might be considered ‘retro’ by adding a few pops of colour to the room and those dull off-white tiles could be transformed with a lick of high-quality paint. When you’re working on a tight budget, it always pays to “refurbish” rather than replace wherever you can.  

  • Shop around for everything (and we mean ‘everything’)  

If certain pieces simply have to go, consider replacing individual items rather than going for a totally new suite. This can lower your total bill dramatically while making your bathroom look completely new.

Homebuilding and Renovating list the average price for individual bathroom installations as follows:

  • Bath – between £480 and £1,000
  • Shower – between £50 and £2,000+
  • Sink – between £50 and £300+
  • Toilet – between £50 and £500

As you can see, prices in the industry can vary greatly. This is why you should always shop around for the lowest price possible.

The two things people always seem to forget when budgeting for home improvements are labour costs and the price to remove your old suite. If you’re not careful, these easily-forgotten charges can quietly push up your overall bill way out of your budget.

Make sure you get quotes on the complete installation cost; including materials, labour, and removals. Ask around for quotes from at least three local tradesmen and select the best price for you.

  • Do It Yourself as much as possible

A macerating toilet, also called an upflush toilet, is ideal if you want to save on installation and labor costs. This fixture is made of durable, high-quality parts. This means they last for years and require very little maintenance. As such, they’re ideal for anyone who wants a unit they can easily install and then not think about for years.

Another tip for staying within your budget is to DIY as much of the job as you can.

Of course, difficult areas like plumbing should only ever be carried out by a fully qualified professional. But when other jobs like tiling can cost you between £350 and £800 for just a tiny bathroom, it may be worth sacrificing a weekend to give it a go by yourself.

  • Little changes, big impact

Other simple touches can have a huge impact on the appearance of your bathroom for a fraction of the cost of ripping out your old suite.

Replacing accessories like shower curtains and bathmats or even just switching to a new colour scheme with your towels can make your bathroom look completely revitalised. The other great perk is that this makeover takes just seconds (and you won’t need to turn your home into a building site in the process!).

For more money-saving tips for home improvements and more, visit the blog by Cashlady today.